背景
女儿经常捣蛋关掉爸爸的台式电脑(上面虚拟机跑着集群),防不胜防,爸爸只好放大招了,使用Siri语音控制台式电脑开关机,物理关机键已被架空。当然,女儿再按关机键爸爸还会装作生气的样子让她开心地”得逞”。注意:最简单最好的方案是使用WOL协议+etherwake,因为我的电脑没有PCIe网卡和有线网络(目前使用的是USB外置的wifi接收器),只好另寻出路。
准备材料
- 树莓派4b x1
- NodeMCU x1
- 5V光耦隔离继电器 x1
- USB线供电线 x1
- 杜邦线 若干
- 面包板 x1
安装树莓派系统
树莓派4b刷上官方64位系统
64位系统下载:http://downloads.raspberrypi.org/raspios_arm64/images/
使用官网安装工具安装系统:https://www.raspberrypi.org/software/
树莓派需要安装服务
- Docker
- HomeAssistant
- MQTT
难点克服
因手上的5V光耦隔离继电器不支持Relay,无法实现点击操作。电脑主机的开机动作是,按下开机按钮,然后马上松手。对应PWR跳线大概是短接一秒左右。如果通过switch控制高低电平输出,效果会变成长按。因此我摸索出了一个解决方案,添加一个触发事件,当检测到PC是打开状态是,则将其关闭。相当于控制一盏台灯,一旦检测到台灯亮了马上出发出关灯指令,那么台灯只会闪烁一下,实现类似Click的效果。
NodeMCU刷入ESPEasy
从 https://github.com/letscontrolit/ESPEasy 下载固件release,自带FlashESP8266.exe刷机工具,固件文件后缀为.bin
打开手机连接NodeMCU的wifi名称为ESP-Easy 密码为configesp
浏览器输入地址 http://192.168.4.1/ 即可进入设置页,然后设置NodeMCU选择要连接到路由器的wifi,输入密码,点击连接,会进入连接倒计时。
记住这个路由器分配给NodeMCU的IP地址,可以在路由器上进行IP绑定,避免每次重新连接是分配不同的IP地址。
此时NodeMCU自身的wifi热点可以关闭了,它已经连接上路由器,我们可以连接路由器分配给NodeMCU的IP即可进入NodeMCU的管理界面。
然后配置MQTT:
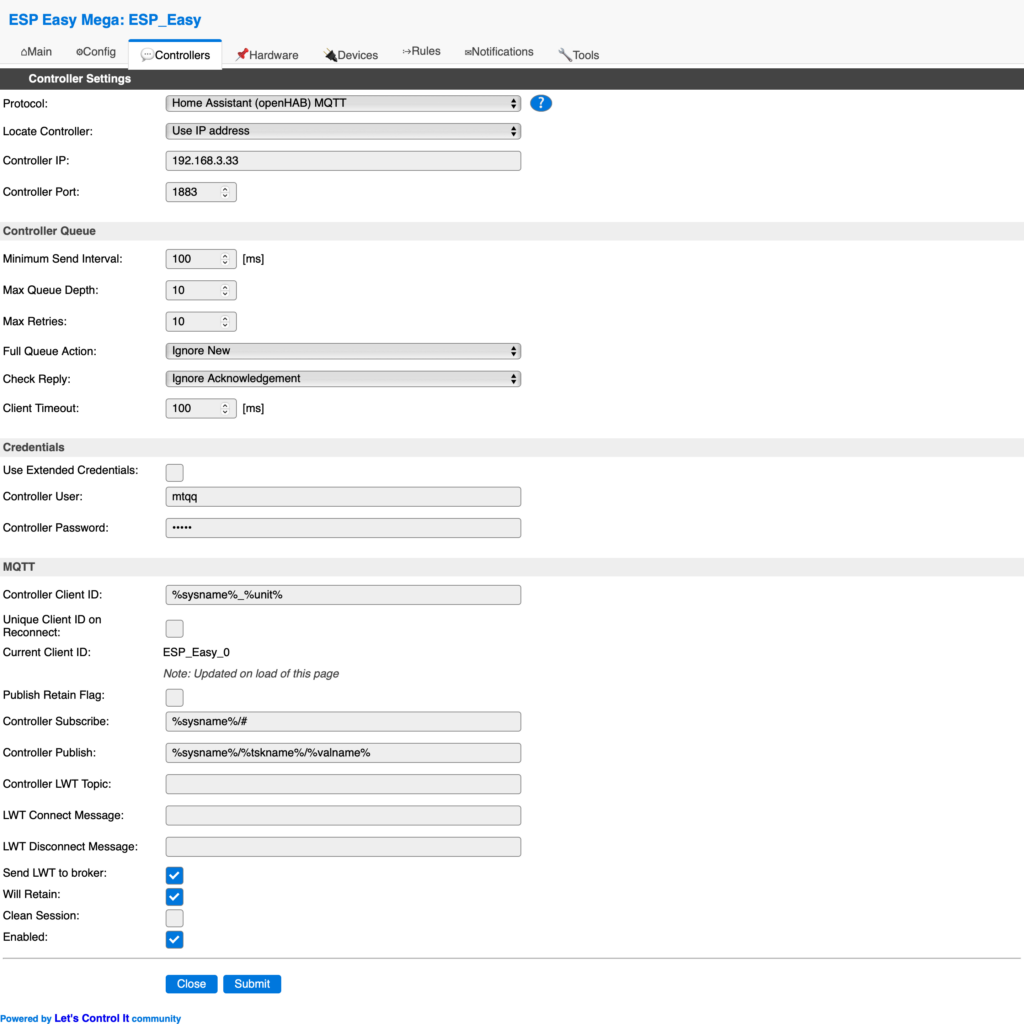
配置GPIO开关:
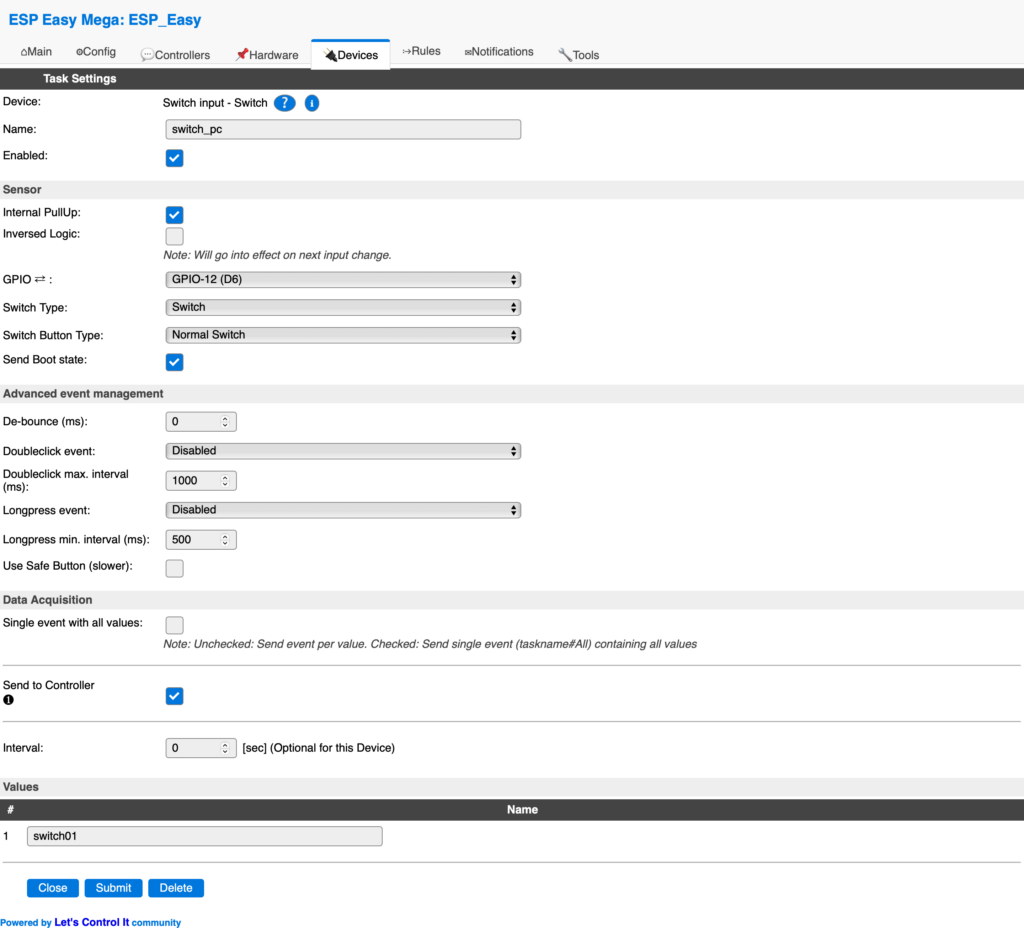
配置说明:
此时NodeMCU会订阅MQTT服务的消息,当接收到值为1的消息,将GPIO-12(D6)引脚置为高电平,当接收到值为0的消息,将GPIO-12(D6)引脚置为低电平。
当需要控制电脑开机时,触发一个值为1的MQTT消息,随后马上触发一个值为0的MQTT消息,那么GPIO-12(D6)状态变化是低电平->高电平->低电平,对应继电器是断开->闭合->断开,对应PWD跳线则是短接了一瞬间(跟用手去按一下物理开机键效果一致),从而实现了开机(关机也一样)。
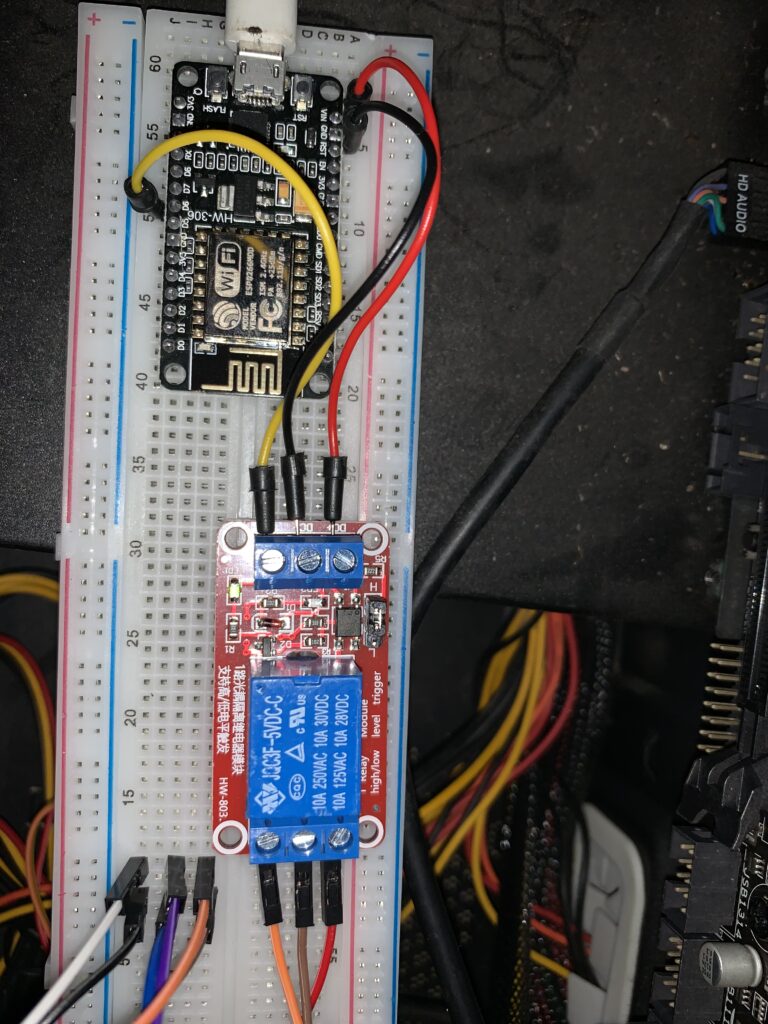
接线
USB线接主机背后的USB口,另一端接NodeMCU进行供电
主机PWD跳线一根接继电器的COM端,另一根接继电器的NC/NO端(高低电平触发)
继电器VCC接NodeMCU的VIN
继电器GND接NodeMCU的GND
继电器IN接NodeMCU的D6
效果如下:
安装HomeAssistant
先安装Docker:
sudo apt-get update

sudo apt-get install \
    apt-transport-https \
    ca-certificates \
    curl \
    gnupg \
    lsb-release

 curl -fsSL https://download.docker.com/linux/debian/gpg | sudo gpg --dearmor -o /usr/share/keyrings/docker-archive-keyring.gpg

 echo \
  "deb [arch=arm64 signed-by=/usr/share/keyrings/docker-archive-keyring.gpg] https://download.docker.com/linux/debian \
  $(lsb_release -cs) stable" | sudo tee /etc/apt/sources.list.d/docker.list > /dev/null

  sudo apt-get update

  sudo apt-get install docker-ce docker-ce-cli containerd.io

  sudo docker run hello-world
安装MTQQ服务:
sudo apt-get update
sudo apt-get upgrade -y

#安装mosquitto
sudo apt-get install mosquitto

#设置用户和密码,这里用户为mqtt
sudo mosquitto_passwd -c /etc/mosquitto/pwfile mqtt

#设置开机启动
sudo /etc/init.d/mosquitto enable
配置MTQQ:
sudo vim /etc/mosquitto/conf.d/mqtt.conf
port 1883
listener 1884
protocol websockets
allow_anonymous false
password_file /etc/mosquitto/pwfile
启动MQTT服务:
sudo /etc/init.d/mosquitto start然后执行以下脚本安装HomeAssistant:
https://github.com/home-assistant/supervised-installer/blob/master/installer.sh
配置HomeAssistant:
vim /usr/share/hassio/homeassistant/configuration.yaml
# Configure a default setup of Home Assistant (frontend, api, etc)
default_config:
# Text to speech
tts:
- platform: google_translate
group: !include groups.yaml
# automation: !include automations.yaml
script: !include scripts.yaml
scene: !include scenes.yaml
homekit:
- name: Tenhan-HASS
mqtt:
broker: 192.168.xx.xx
port: 1883
username: mtqq
password: xxxxx
discovery: true
switch:
- platform: mqtt
unique_id: "switch.dian_nao_zhu_ji"
name: "电脑主机"
state_topic: "ESP_Easy/switch_pc/switch01"
command_topic: "ESP_Easy/gpio/12"
payload_on: "1"
payload_off: "0"
state_on: "1"
state_off: "0"
optimistic: false
qos: 2
retain: true
automation:
trigger:
- platform: state
entity_id: switch.dian_nao_zhu_ji
from: "off"
to: "on"
action:
- service: homeassistant.turn_off
target:
entity_id: switch.dian_nao_zhu_ji
# Turn off whichever entity triggered the automation.
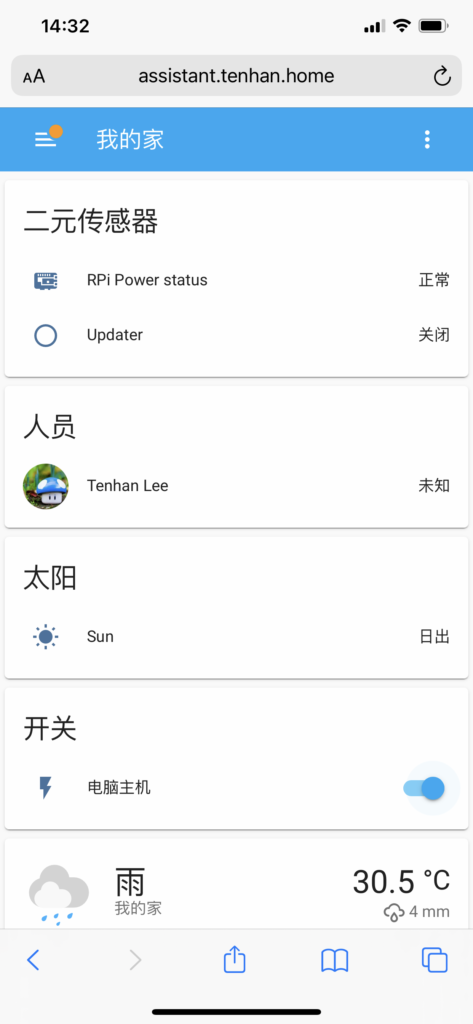
#entity_id: "{{ trigger.entity_id }}"可以通过网页访问HomeAssistant,也可以下载HomeAssistant的app进行连接。
例如浏览器打开:http://<host>:8123
效果如下:
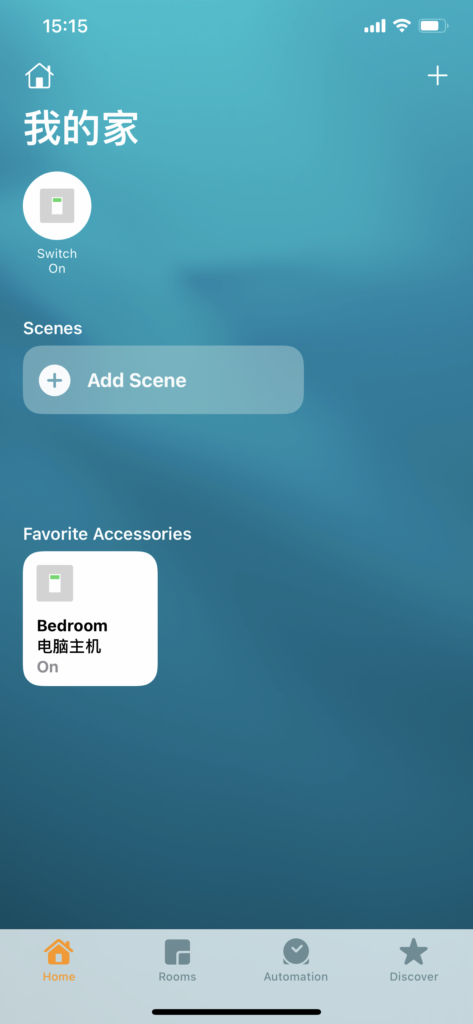
iPhone接入HomeAssistant
打开HomeAssistant后台管理页面
打开iPhone的Home应用,通过扫描HomeAssistant后台管理页的二维码进行接入,按提示操作即可。
接入HomeKit的效果:
通过Siri语音控制开关机
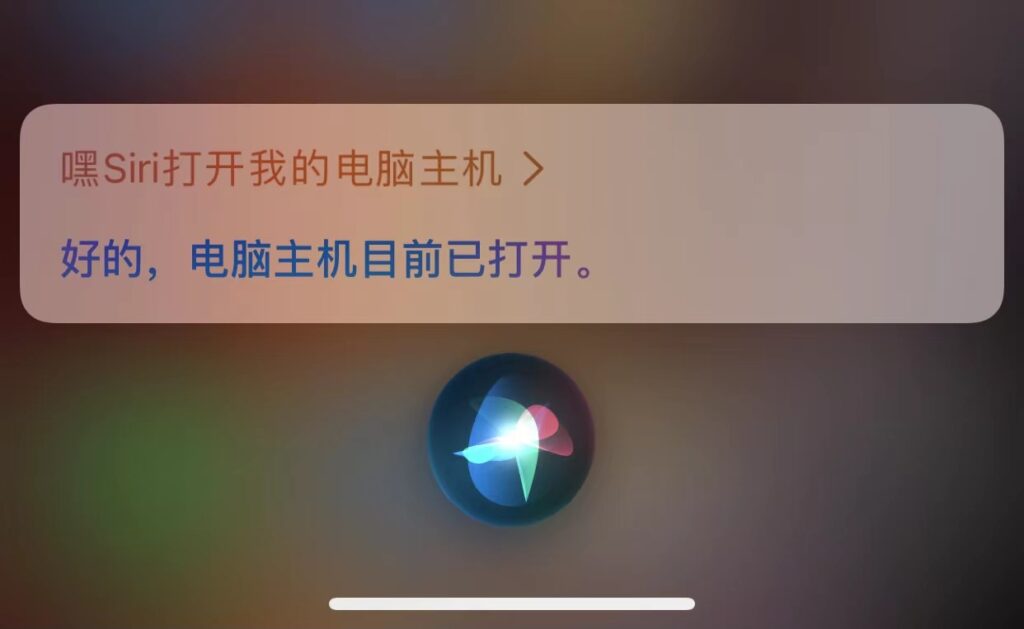
随着滴一声,电脑开机,大功告成。